Building a rural shed is a practical way to add storage, protect valuable equipment, or create a dedicated workspace on your property. But getting it right isn’t just about putting up a structure, it requires careful planning from the outset.
Whether you need a simple storage solution or a more complex building for farming operations, a few key decisions will shape how well your shed works now and into the future.
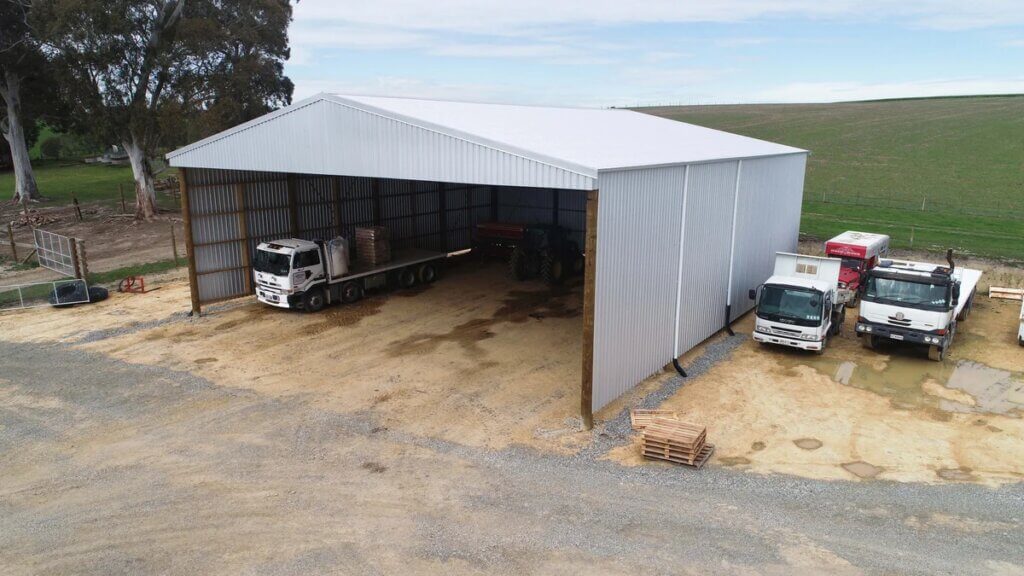
1. Purpose and Use of the Shed
Before anything else, start by thinking about what you actually need your shed for. What will you be storing or using it day to day?
It might be for agricultural storage, such as hay, feed, or machinery, or you may want a practical workspace or even shelter for livestock. Whatever the use, being clear on this from the beginning will make it much easier to decide on the right size, design, and materials.
Here are some common uses for rural sheds in NZ:
- Agricultural storage (e.g., hay, feed, or machinery)
- Livestock shelter
- Workshop or storage for tools
- Storage for vehicles (e.g., tractors, trucks, or boats)
- Personal use, such as creating a hobby space or garage
2. Location and Site Selection
Where you place your shed can make a big difference to how well it works over time. Things like the local climate, the terrain, and how easy it is to access utilities will all affect both the build process and how usable the shed is long-term.
Key considerations include:
- Proximity to access roads: Ensure the site is easily accessible for delivery trucks and heavy machinery.
- Drainage: The site should have good drainage to prevent water accumulation, which could damage the shed’s structure over time.
- Wind and sun exposure: Avoid placing your shed in an area prone to high winds, which could weaken the structure.
- Topography: Level ground is ideal for stability, but if your site has a slope, it might require additional work to ensure proper drainage and foundation support.
3. Design and Size
Getting the design and size right is one of the most important parts of your shed project. Once you’re clear on how you’ll use the space, you can start shaping a design that actually works for your needs.
A few key things to think about include:
- Clearspan design: This is important if you want the maximum usable space without columns or beams obstructing the interior.
- Bay size and height: Depending on your needs, you may require larger bays for bigger equipment or a higher roofline for storage or clearance.
- Materials: Rural sheds are typically built with durable materials such as pre-dried timber and structural steel to withstand New Zealand’s harsh weather conditions.
It’s a good idea to sketch out your layout early, then speak with a professional to make sure your design is practical and can be built efficiently.
4. Building Codes and Consents
Before you start building, it’s important to check your local regulations to make sure your shed meets all zoning and building requirements.
In New Zealand, many sheds will need building consent, especially if they’re larger, located in certain areas, or used for agricultural purposes. Getting this sorted early can save you time, money, and potential headaches later.
5. Structural Integrity and Durability
Your shed needs to be built to last, especially in rural environments where it will be exposed to the elements year-round. Investing in a strong, durable structure from the start will save you time and money on repairs down the track.
- Strong foundation: A solid, level foundation will ensure that your shed remains stable and durable over time. Concrete slabs are commonly used for agricultural sheds, providing stability and a long-lasting surface.
- Weather-resistant materials: Choose materials that can handle the New Zealand climate, from high winds to snow and rain. Timber and steel are often used for rural sheds due to their robustness.
- Bird-proof design: If you’re storing equipment or livestock feed, a bird-proof shed may be necessary to prevent contamination from bird droppings.
6. Costs and Budgeting
A rural shed isn’t a small investment, so it’s worth getting your budget right from the start. Planning ahead helps you avoid unexpected costs and keeps the project on track.
Make sure you factor in all the key expenses, including:
- Materials
- Construction fees
- Labour costs
- Permits and consents
- Delivery charges
So, allowing for these in your budget will help you manage the shed’s long-term upkeep more effectively.
7. Maintenance and Longevity
A well-built rural shed is designed to last, but it still needs regular upkeep to stay in good condition. Keeping on top of maintenance will help you avoid costly repairs and extend the life of your shed.
To keep everything in good shape, make sure you:
- Regular inspections for signs of damage or wear.
- Keeping gutters and drainage systems clear of debris.
- Maintaining the roof and walls to prevent leaks.
- Sealing wooden surfaces to prevent rot and weather damage.
Staying on top of these small jobs can make a big difference, helping your shed remain functional and secure for years to come
8. Choosing a Reliable Shed Supplier
Choosing the right supplier is just as important as the design and materials. It’s essential to work with a reputable company that has experience in rural shed construction. Look for a supplier who:
- Offers a wide range of shed designs to suit your needs.
- Has a track record of high-quality, durable builds.
- Can guide you through the process of design, consent, and construction.
- Provides after-sales support and maintenance advice.
Conclusion
Building a rural shed isn’t just about the structure itself, it’s about making sure it works for your land, your needs, and your long-term plans.
By thinking carefully about everything from purpose and location to design and budgeting, you’ll set yourself up for a shed that’s practical, durable, and built to last. A bit of planning upfront can save a lot of time, money, and hassle down the line.